Fireplace Makeover Rescue
How side of the road wood scraps became a fireplace rescue!
INDOORS
High
Medium
20+ Materials
6 Hours


While driving past a local fruit processing plant one day, my wife noticed a collection of lumber-like frames by the roadside, likely used to secure barrels. We seized the opportunity to acquire them, bringing the stack home without a clear plan for their use initially.
These were wooden frames put together with heavy metal corner brackets and about 6 feet in height when stacked one on top of the other. To facilitate moving the frames from the driveway on the side of the house, I simply trimmed the corners with an electric saw to maximize the usable wood without having to dismantle the metal brackets. Then it was an easy store in our shop.


Several months later, an idea struck me as I gazed at our uninspiring brick fireplace—decorating its top portion with the acquired wood could enhance its aesthetics and reduce the prominence of the brick, serving as a compromise to improve the fireplace's appearance. As with any project where you are working with power tools always follow the manufacturer safety recommendations and wear eye protection
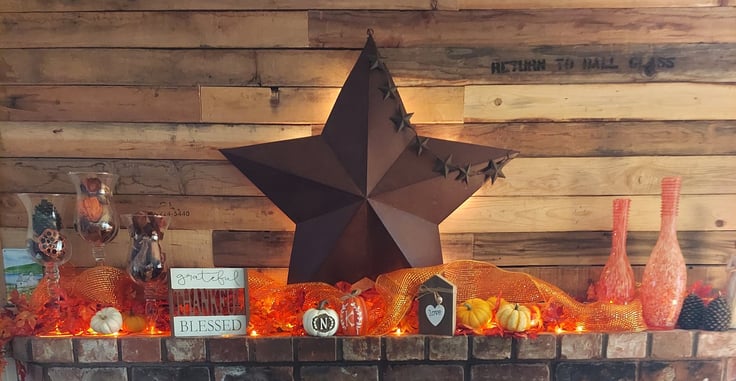
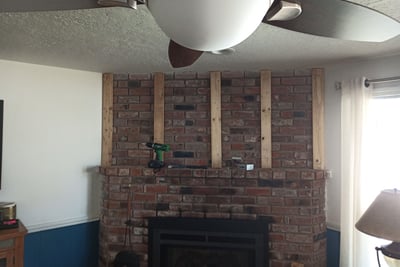
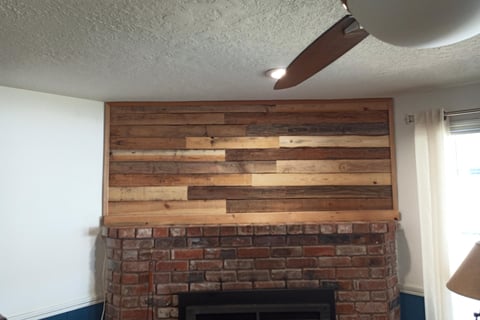
First things first, some small scrap wood attached to the ceiling as well as the brick with anchors and then attaching the random boards in a pattern and color choice that appeals to you. We chose to leave the burned in messages on the wood, because we liked the character that it provided. Below is a picture of the outcome. FYI, the bottom board goes the entire distance across and was made with 1x2's in an L shape. This board moves in and out and covers an electrical cord used for lighting up the fireplace during seasonal displays.
Subsequently, I repurposed this wood in various other projects, which I will share through additional posts.
Materials
Your favorite weathered plank wood
Firing strips (quantity will vary)
Masonry Anchors
Sheetrock/plaster anchors (optional)
1/2-3/4" finish nails or brad nails
Small trim pieces of your choice (top and sides)
Tools

Eye Protection (safety goggles)
Impact Driver
Drill and masonry bit
Hammer or Brad Nailer (corded or cordless)
Your imagination
Project Wins
Finding this wood in the first place!
We were looking for a compromise for the volume of brick. My wife likes the brick, where I would have just as soon white washed it. This provided us a compromise.
Project Fails


I'm not sure that I really have a "whoopsie" on this one, except that I underestimated the amount of time it would take to complete. Even so, I had it done in a long afternoon.
Kevin Gallaher is the owner of this blog, papapinterest.com. I have applied a skill level based on my own experience and provided minimal instructions on how to achieve a similar outcome. Please remember that this blog is for entertainment purposes only. With all the posts on papapinterest.com, be certain to read and understand the project before starting. Build at your own risk and be safe. We will not be responsible for any injury or damage incurred while following any post from our site. None of our posts should be considered expert advice, so please consult a professional when necessary. Be sure to read and understand all safety and instruction manuals, and take safety precautions seriously. All projects performed from posts found on our site are done at your own risk.
DIY Disclaimer


