Spooky Halloween Plant
Quick and easy Halloween DIY
SEASONALFEATURED
Low
Low
15 Materials
1 Hour

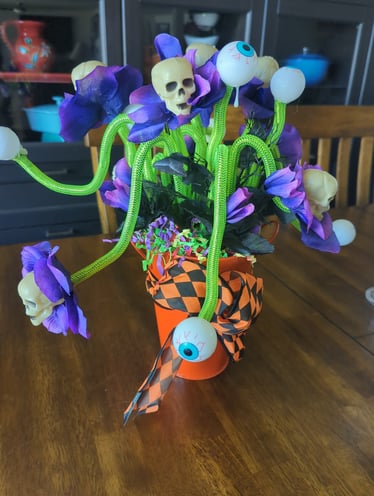
This creepy and fun creation took less than an hour to put together. It's more of a crafty DIY, instead of a get your hands dirty with power tools type of activity. Supplies were things that I had already purchased and had on hand from the Dollar Store. The flowerpot was from a miniature lemon tree we purchased a few years back that I've been waiting for the right project for. Since it was already orange it seemed fitting that it would make its way to a Halloween decoration, but you could pick your pot and make it any way, or any color you like.
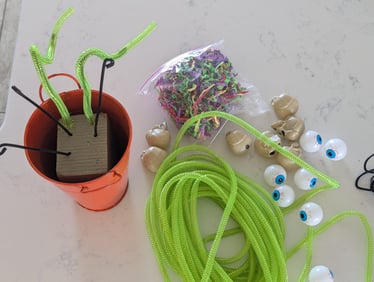
To start, make sure that your flowerpot is cleaned inside and out and ready to start your project. Cut some dry foam leaving about an inch and one-half from the top of the flowerpot and push the foam down firmly to secure it. If necessary, you may want to use a touch of hot glue to secure it to the bottom of your flowerpot. Because of the shape of my pot, I just simply had to press it firmly to secure it.
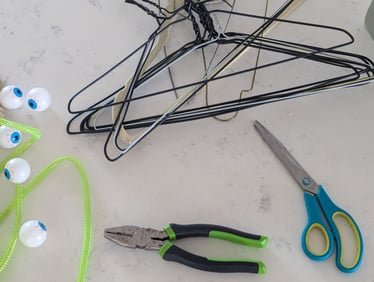
Next, start by determining the length you would like your stems to be. I varied my lengths with some being bent and others being left completely straight until I had a desired look. Not really cutting through the hangers directly, but instead doing the back-and-forth bend motion to cut them to the desired length using my pliers, I could get about 3 stems per hanger. Shape the stem how you want leaving the end that will go into the dry foam straight, and curling the other so that it's not sharp.
After completing all of your cuts and bends and placing the wire hangers in the dry foam inside the planter, take the green mesh tube and feed it over the top of the hangers, cutting to length leaving in some cases up to 6 inches beyond the end of the curled hanger. Gently push this back over the curl of the hanger, and attempt to get the mesh tubing to stay in place. I didn't hot glue this, because I wanted the mesh tubing to cover the entire hanger, including the curl, and match up to the back of the eyeball or skull when glued together. Complete this process for all the wire hangers in the flowerpot (you'll glue it to the eyeball or skull later).


Next, using the hot glue gun place a generous amount of hot glue on the eyeball or skull, taking careful consideration of how you will want the eyeball or skull to look once it's affixed to the hanger. Using one hand place the eyeball or skull on the tip of the curled hanger where you have placed the hot glue, and with the other hand bring the mesh tubing forward to cover the curled part of the hanger and affix to the back of the eyeball or skull. I even had a few spots where the glue hardened in a teardrop shape and the grandkids thought it was cool, because it looked like the eyeball was crying so it was left as is. Repeat this process for each of the wire hanger stems in your pot randomly placing the eyeball or skull to your liking. I should note here that you could easily just complete this process with either all eyeballs (which I have seen online) or all skulls and no flower petals, but I happened to have a mixture of both and chose to use them. This also worked out well for my next step which was an add-on from what I had seen elsewhere.
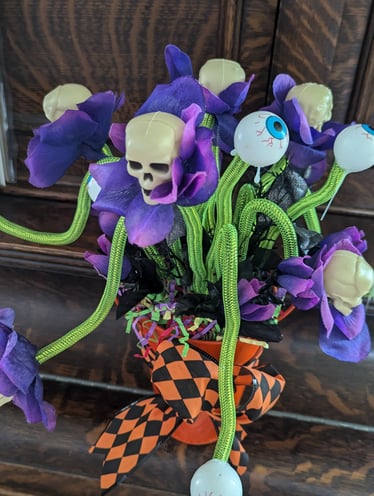
While digging for more glue in my supplies, I ran across the purple roses (silk) that I had purchased for another project from the dollar store, but never got around to completing them and thought why not. Using the purple rose petals around only the skulls it seemed to bring more definition, purpose, and color to the project. I carefully pulled the roses off the tips of the wire they were attached and removed all the plastic pieces to get to just the rose petals. In my case most of the roses had a plastic piece at the base, 3 petals and a center with plastic and smaller petals. By the end of this project, I used almost every piece of the cut roses.
Carefully open each petal and cut at one of the junctions between the petals to the hole in the center. The result should be that you have one cut halfway through to the hole in the center of each petal. Starting with the smallest of the petals place a drop of hot glue next to the center of each petal. My petal had 3 in a cluster, so I placed 3 drops of hot glue, top and one on each side near the center hole. Next, hold your petal open where it is cut wrap it around approaching from the back of the skull or eyeball and hold it in place for a couple of seconds so it attaches to the back of the skull or eyeball. If necessary, use a couple of extra drops in different locations if needed to hold the petal up better. Repeat this process for each petal (smallest to largest) and place them so that they overlap between each petal opening to add the correct fullness.
I took the remaining pieces from all the roses (empty wire stems from the petals being pulled, black leaves that remained and centers from the roses) and assembled additional stems that I used to fill in the remaining space in the center of the flowerpot. Next use your choice of filler for the base, I used multicolored, shredded crêpe paper, but you could easily use sphagnum moss, or filler of your choice. Finish this off with a bow of your choice (I used a couple of spots of hot glue under the bow to hold it in place, but also keep in mind that the bow is completely optional), and you will have the perfect centerpiece and certainly a conversation starter for your next Halloween gathering!
Enjoy!


Materials
Flowerpot of your choice
Spray paint (optional)
Dollar Store Eyeballs and/or Miniature Skulls
Hot glue sticks
Crafters Dry Foam
Dollar Store Mesh Tube
Dollar Store Purple Roses (purchased around Halloween time)
Multicolor crêpe shreds or your choice of filler
Wire Coat Hangers (5 or 6 depending on fullness desired)
Ribbon for flowerpot (optional)
Tools

Hot glue gun
Scissors
Pliers
Butter knife (for cutting dry foam to shape)
Project Wins

So simple and easy to make. It honestly almost took longer to gather supplies than it did to put this together.
The grandkids loved this project!
Kevin Gallaher is the owner of this blog, papapinterest.com. I have applied a skill level based on my own experience and provided minimal instructions on how to achieve a similar outcome. Please remember that this blog is for entertainment purposes only. With all the posts on papapinterest.com, be certain to read and understand the project before starting. Build at your own risk and be safe. We will not be responsible for any injury or damage incurred while following any post from our site. None of our posts should be considered expert advice, so please consult a professional when necessary. Be sure to read and understand all safety and instruction manuals, and take safety precautions seriously. All projects performed from posts found on our site are done at your own risk.
DIY Disclaimer


