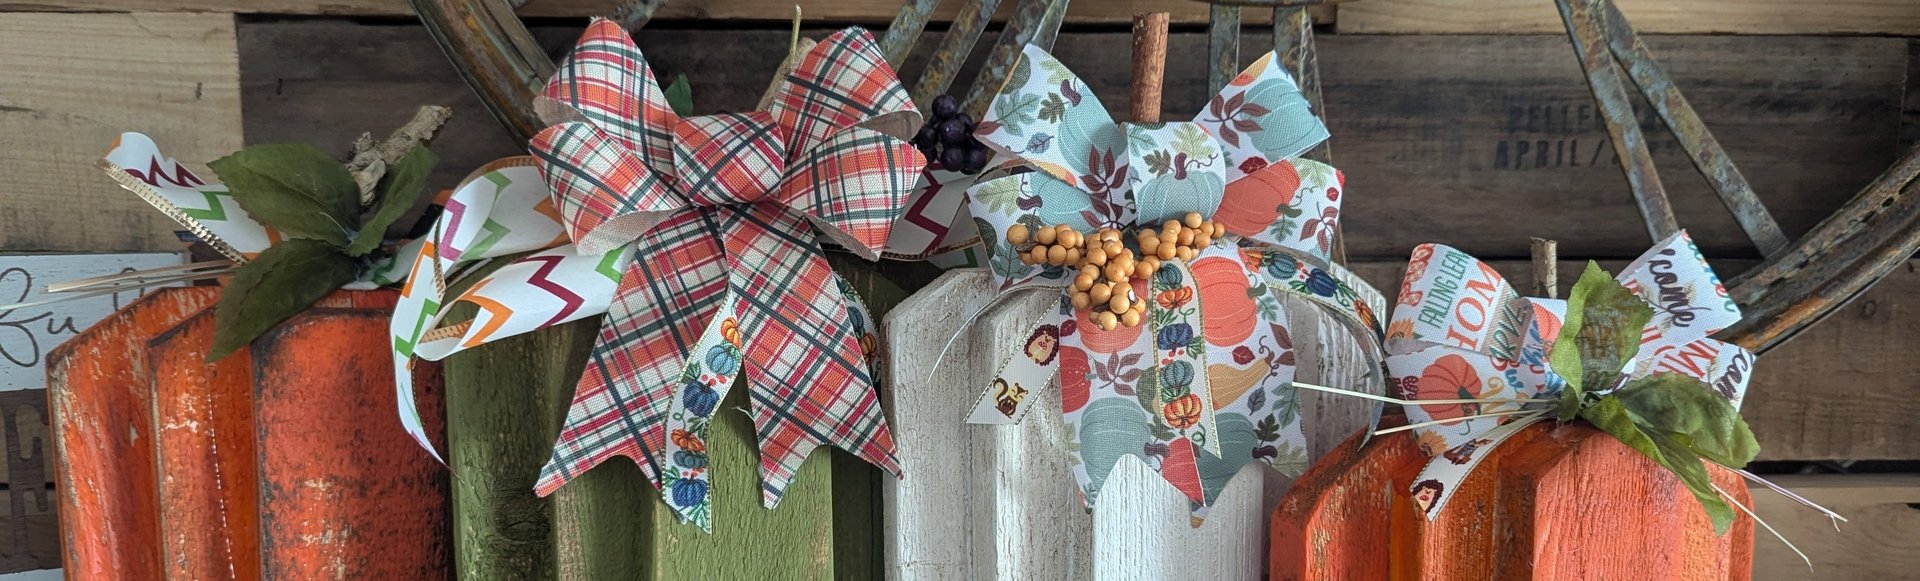
Pumpkin Patch
DIY pumpkins from scrap wood
SEASONALFEATURED
Low
4-6 Materials
1 Hour
Medium

With the seasons gearing up to change, and summer winding down, I found myself with leftover wood scraps from creating the outdoor planters for the front of the house. Wanting to do something with the leftover scraps, and with the season near, it seemed the right thing to do in creating these super simple wooden pumpkin decorations.
A few cuts, some paint, stain, and Dollar Tree embellishments and the patch was full. These are super simple to do and there isn't a whole lot of measuring either. The size is really dependent upon the amount of wood you have available and what you are looking for. I would assume that you could even build these in larger sizes to be used as front porch decorations, or one that sits on the floor. If you were making these to be used outdoors, I would recommend using exterior paint and/or a SPAR urethane to coat these to protect them from the elements.
Since there is no real measuring to these, I started by lying the pattern out to decide what I wanted. I used 1x3 lumber and these are made for display of the front side only, so there isn't any depth to these other than the stacking you see in the photo. You could make these into an entire pumpkin for table decoration, or the like by simply combining two of them together.
Once I had decided on my pattern, I took a look at the overall design to decide the contour that I wanted to the pumpkin's shape. I decided on a 31° angle at the corners of the wood, top and bottom on outer pieces that were exposed. I left the bottom center of the front piece straight on some but added a contour on others. You could really do it to your liking either way. I first put everything together as a dry fit and then decided the height I wanted these to be and made my cuts straight across the bottom first, then made my 31° cuts on the scraps where appropriate.
After completing all my cuts, I used the brad nailer to assemble these. I did not use any wood glue or adhesive to put these together, though I suppose you could use wood glue or hot glue to assemble these. I used 2 brad nails in each piece from face down to attach these together. I then flipped it over and put additional brad nails in the backside to ensure a good hold.
Next, I found the top center and used a 3/8" wood drill bit to drill a hole for the stem.


Give these a light sand with your sander, and then once these are wiped clean of all the sawdust, it's time for painting. I used indoor craft paint for these since I would only be using them for the decorating inside the house. I lightly brushed the paint on in most spaces and left it that way purposely since I would follow it up with a top coat of wood stain to finish off the piece. After the painting was completed and allowed time to dry, I applied the stain finish to these using an old wood stain that I had around the house. You can really select any color of stain that you prefer for your pumpkin, just remember that if the you use a light-colored stain it may take more coats to get your desired look, if you use a darker stain, be sure to wipe it off while the stain is still wet.
After everything was dried, I used a stem out of the yard debris can from a recent pruning of the forsythia bush for one of the pumpkins, however if you don't have a recent pruning, a cinammon stick works quite nicely as well.


The final touch to these (besides how you will display them) is to hot glue the embellishments of your choice. Most of what I put on mine was purchased at the local Dollar Tree since things are out in stores right now. We're really happy with how they turned out.
Enjoy!
Materials
1x3 Scrap Lumber
Brad nails or finish nails
Embellishments of your choice
Cinnamon sticks or yard pruning debris
Paint (interior or exterior, your choice of color)
Wood Stain, your choice of color
SPAR Urethane (optional)
Hot glue or outdoor (E6000) glue (optional)
Tools
Eye protection (safety goggles)
Compound Sliding Miter Saw, or Hand Miter Saw
Sander, or Sandpaper, or Sanding block
Brad Nailer, or Hammer
Hot Glue Gun
Rags (for stain)
Paint Brush
Project Wins
These were super simple to construct.
They look great as decoration.
Super cheap to make as I mostly used supplies I already had.
Kevin Gallaher is the owner of this blog, papapinterest.com. I have applied a skill level based on my own experience and provided minimal instructions on how to achieve a similar outcome. Please remember that this blog is for entertainment purposes only. With all the posts on papapinterest.com, be certain to read and understand the project before starting. Build at your own risk and be safe. We will not be responsible for any injury or damage incurred while following any post from our site. None of our posts should be considered expert advice, so please consult a professional when necessary. Be sure to read and understand all safety and instruction manuals, and take safety precautions seriously. All projects performed from posts found on our site are done at your own risk.
DIY Disclaimer